
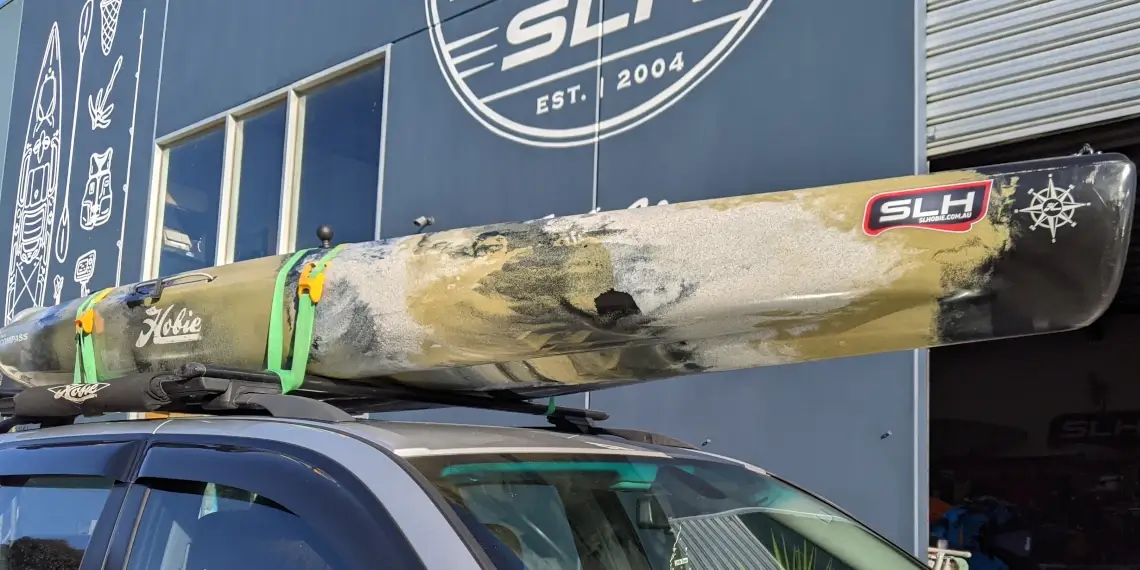
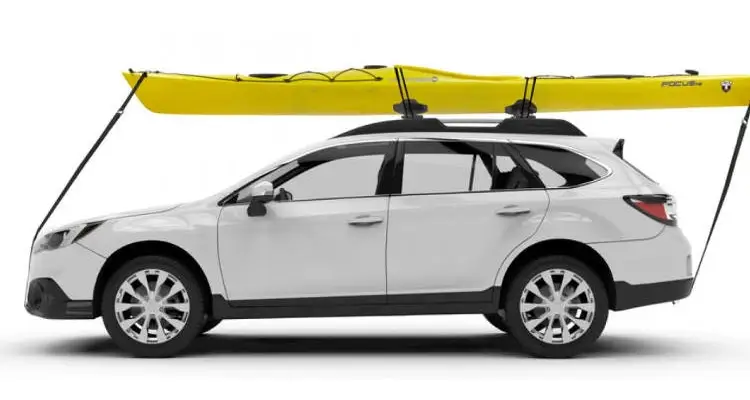
Strapping kayaks securely to roof rack cross bars isn’t rocket science but it’s important to get it right. The very last thing you want to see is your kayak flying off the roof of your car so obviously it’s important to get it right. The image above is a pretty good example of how we would recommend to go about it.
There’s a couple of points we want to highlight here, first and foremost that the straps are secured hugging the sides of the hull, which we do to eliminate the potential for any sideways movement. The strap isn’t just pressing down against the top of the hull, but is also snugged up securely on each side. Here’s another angle that demonstrates how we like to go about it.
Because the strap is routed underneath the cross bar on either side of the kayak you end up with 2 lengths of strapping making contact with the hull along the top deck and each side of the crossbar. This is ideal, because the more the straps are making contact with the hull, the more secure it will be. Here’s another angle that demonstrates how we like to go about it.
Note the position of the cam buckles in both images above. The tag end of the strap is routed underneath the crossbar and up to the cam buckle, which is positioned just below the top deck. This way when you pull the strap you are pulling it down, which gives you much better leverage than pulling up. This clip in the video below provides another demonstration.
What not to do:
Our next example is probably the most common mistake that we see customers make. Instead of securing the straps snugly on each side of the hull, the straps are wrapped around the crossbar on the outer side of the crossbar mounts. Not only does this method lack the same degree of downward pressure, it’s no where near as effective as preventing sideways movement than the examples above.
What to definitely not do:
An even better example of what not to do is pictured below. In this image the strap is simply wrapped around the kayak and underneath the crossbar at a single point. Not only does this method result in much less contact between the strap and the hull, it is only routed underneath the crossbar once, and the angle of the strap where it crosses underneath the bar is doing very little to secure it in place. This is a terrible way to go about tying down a kayak because not only is it much harder to achieve appropriate tension on the strap, there isn’t enough contact being made with the strapping on the hull or crossbar to be reliable. Doing it like this is almost certainly going to result in sideways movement and is ill advised. Do not tie your kayak down like this whatever you do!
Cam buckle straps vs Ratchet straps
Note that we’re using cam buckle style tie down straps in the examples above, as opposed to ratchet straps. We see a lot of customers using ratchet straps and although these will do the job, it is possible to overdo the tension and inadvertently compress the hull in the process. If kayaks are strapped down with ratchet straps too tightly – especially for longer periods of time (and particularly in warmer climates) this can result in dings in the base of the hull. Add to this they are simply more fiddly and time consuming to use.
Good quality cam buckle straps are easy to use, very reliable and more than enough to do the job sufficiently, providing you follow our example of how to do it properly. However we strongly recommend to check the tension on the straps every now and then to make sure they are still taught and secure. Every time you stop for petrol is a good opportunity to check the straps, make sure nothing has slipped and that they are still securing the kayak properly.
We also recommend to avoid using the cheapest straps you can find (regardless of what kind they are), so make sure whatever you use comes from a reputable brand. Dollar store straps aren’t likely to be very UV resistant (resulting in weakened straps over time) and poorly manufactured cams are more likely to fail under load. We should add here that exposed cams that do not have a protective cover of some kind are more likely to cause scratches and scuffs on the hull of your kayak, and possibly even your car’s paintwork as well. Look for straps with cam buckles that have a neoprene, rubber or silicon cover to avoid this.
Bow & Stern Straps
We’re often asked whether or not bow and stern tie downs are required. Although we always reply by saying that it’s a good idea to use them (especially on longer road trips), it usually isn’t completely necessary. This will depend somewhat on the length of the kayak and the distance between the rack bars. The longer the kayak and the shorter the distance between rack bars, the more likely it is that bow and stern tie downs will be useful. Most of our customers get by just fine without them, but if in doubt it certainly wouldn’t hurt to use them.
If your car doesn’t have convenient tie down points for bow and stern straps. products such as the Yakima Hood Anchors provide a quick and easy get-out-of-jail-free card.
Cradles & Roof Rack Pads
We are often asked if it is necessary to make use of rack pads or kayak cradles and our answer generally depends somewhat on the kayak hull shape and to some degree the roof rack setup. Kayak cradles do a good job of offering support to secure the kayak in position and can help to eliminate sideways movement. Cradles can be particularly effective when used with V-shape hulls, which generally don’t sit terribly well in rack bars. Fortunately most of our customers don’t have this problem because Hobie don’t make any kayaks with v-shaped hulls, which means the base of the hull is making more contact with the rack bars.
There are a few cons to consider with kayak cradles. Firstly, some of them can make it harder to get your kayak up and onto the racks. This really depends on how you go about loading the kayak. For example, if you load from the side of your vehicle, instead of just having to lift the kayak up and onto the racks, now you have to lift it higher to get up and over the cradles. RhinoRack’s side loading kayak cradles are designed to mitigate this problem.
We should also mention that not all hull shapes will be supported all that well with cradles. Because kayak hull shapes vary so dramatically there is simply no single cradle type that works well with them all. Its all about matching horses for courses. We can help advise on what we think your best options are when we know which kayak you’re car-topping, and what kind of vehicle and roof rack arrangement you’re working with.
Roof rack pads can serve a similar purpose to cradles and it is generally a good idea to make use of them. Although most Hobie kayak models fair quite well being transported on naked rack bars, rack pads will provide a bit of cushion between hull and bar. And after having been used a few times rack pads that have a reasonable thickness and density will form a cradle-like shape where the hull has been pressing down into it. Rack pads can also help to minimize friction when sliding the kayak onto the racks. Bare naked bars typically have a rubber strip at the top, and these have a habit of gripping the base of the hull when you slide it on. Rack pads help to prevent this from happening.
FAQs
Q: Should my Hobie kayak be placed on roof rack cross bars upside down or right side up?
A: The mostly depends on which model Hobie kayak that you have. Some of the earlier models were more prone to dings and hull deformation if stored on crossbars right side up. This is partly due to the hull shapes that were more common at the time and also because the plastic was softer and hulls had less reinforcing. Hobie’s generally recommended for these models to be stored upside down. Save for the Pro Angler models, the ideal way to store early model Hobie kayaks was upside down, unless using cradles. This was especially true of the models with a protruding keel line, such as the Sport, Outback and Outfitter.
Newer models generally handle being stored right side up much better their earlier counterparts, although most of them can be stored upside down safely as well. That said, it is important to remember that if a kayak is strapped down too tightly – especially for longer periods – it is possible that a mild ding will form. Should that happen you might want to consult our guide on dealing with dings in kayak hulls
Q: Can I leave the seat installed on the hull when transporting?
A: Technically, yes you can but it is certainly not recommended to do, for several reasons. Firstly, if you’re leaving the seat attached to the hull when you car top it, you’re dealing with unnecessary weight. Secondly, the seat will cause a little wind drag and won’t be great for fuel efficiency. Finally – and most importantly – the seat will likely be sticking up significantly higher than the hull, and if this slips your mind while you drive under a low hanging car port there’s a good chance the seat will be damaged, if not the hull as well. Hobie kayak seats are not cheap, so obviously its best to avoid having to buy a new one. You can get away with this if you’re using a trailer, but think twice about doing it on the roof of your roof.
Q: Can I leave accessories such as fish finders and rod holders installed while transporting the kayak
A: Technically yes you can, but you really shouldn’t, for much the same reasons it doesn’t make sense to leave a seat installed. Just remove all of the accessories and store them inside your vehicle to be safe.
