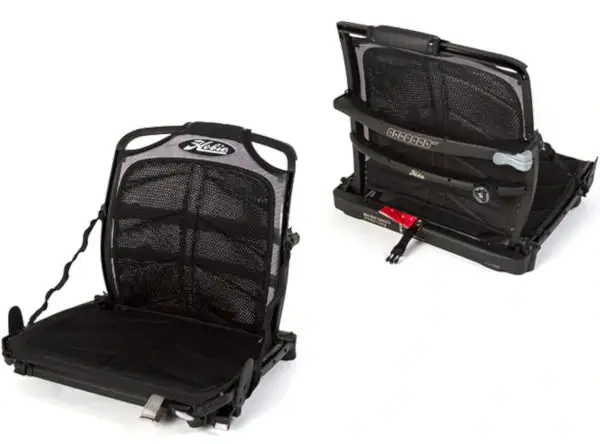
 Hobie Vantage CT seats have been used in multiple kayak models from Hobie since it was introduced back in 2015. Its a clever design that adds a level of comfort that was previously lacking in Hobie kayaks, offering a raised seated position and several points of adjustment. It’s not all that uncommon for users to run into issues with these seats, however, especially from users that purchased a second hand kayak (and didn’t get a proper introduction to how the seat operates).
Installing Vantage CT Seats
The most important points relates to how to go about installing them. There are two important points to look at here; how to mate the seat adapter at the front to the crossbar in the seat well, and making sure the security clip is connected at the back. If the seat isn’t properly connected to the crossbar the seat won’t hold position properly. And if the security clip isn’t connected at the rear there is a risk of losing your seat in the event of a capsize. That last point is fairly self explanatory, so just remember that it is critical to secure the seat at the back. Mating the seat adapter and crossbar requires a little more explanation however.
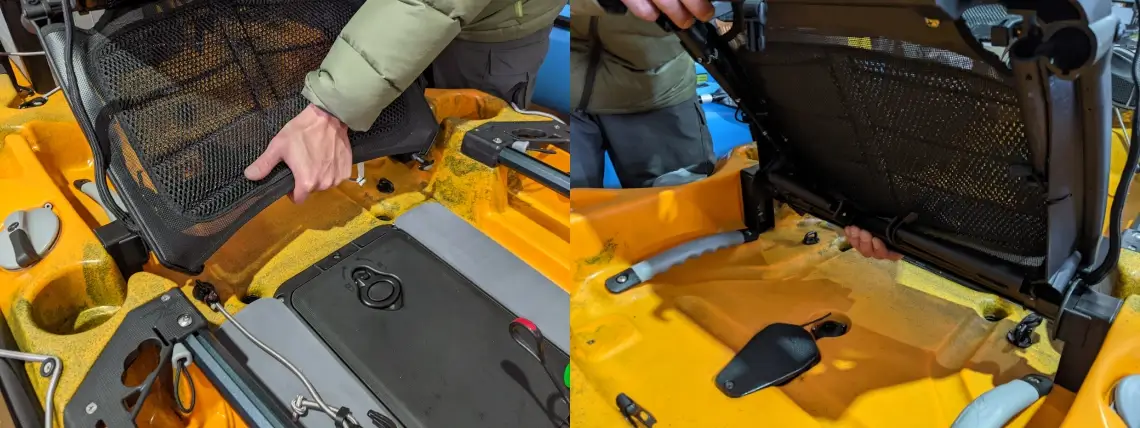
In the timestamped segment of the video shown below, Hobie demonstrate that it is easier to mate the front seat adapter to the crossbar when the crossbar in an elevated position – it is trickier to do if the crossbar is in the lowest position. With the crossbar in an elevated position the then demonstrate aligning the adapter to the crossbar. This part of the process is relatively simple, but it is the next step that some users get hung up on.
To fully connect the adapter to the crossbar, the technique shown in this clip is to raise the back end of the seat while pushing down at the front, and then lowering the back into position. In our experience, this method only works some of the time. It is here that we would like to interrupt the broadcast and add an extra tip that makes it easier to get this right. We’ve found that a more reliable method of connecting the adapter to the crossbar securely is to place your fingers on the crossbar and squeeze when you push down at the front of the seat. This helps to secure the crossbar firmly into the adapter and you should feel it clicking into place as you lower the back end down again.

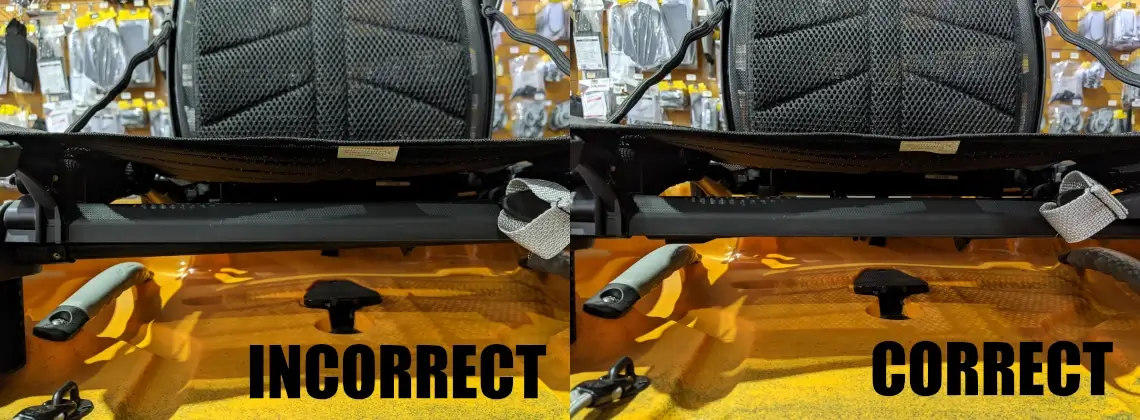
Once you’ve done it a few times it becomes second nature and you won’t have to pay it any more thought. But if you want to check if its connected properly before jumping in and heading out onto the water, look at how the crossbar is attached to the adapter. If the crossbar isn’t seated evenly from left to right it’s not installed properly. The example image below demonstrates what to look for

With the front of the seat securely connected then make sure to buckle up the security clip at the back and then you’re good to go.
Following on from the installation example shown in the video, they go on to demonstrate how to make adjustments for maximum comfort. This is very much a personal preference thing, so some experimentation may be required to get it just right for you.
Vantage CT Seat Maintenance
It’s not common for us to hear of maintenance issues on Hobie’s Vantage CT seat systems, although the video below provides some useful pointers on keeping it in tip-top operating condition. Prevention is better than cure, however, and our best advice on this front is to rinse the seat after each use (particularly if used in salt water conditions) and ideally with warm water, which does a better job of dissolving salt.
Another point that we would add to the maintenance discussion here is to keep an eye on the CT Vantage Seat screws at the pivoting point at both corners of the seat. We’ve known of cases where these have inadvertently backed out, although only really on earlier versions of the Vantage seat (which were not assembled with Loctite at the time). Check these screws and make sure they are screwed up securely (use Loctite if you notice a loose screw – replacement screws now have Loctite included)
Replacing seat mesh upholstery sections on Hobie Vantage CT Seats
The video below demonstrates how to go about replacing mesh sections (back and bottom) on Hobie Kayak Vantage CT Seats. Honestly, they’re making it look a little easier than it probably is – this task might require a little trial and error. Ideally you want to avoid ever having to replace either of the mesh panels, so do your best to maximize their lifespan. Don’t stand on them whatever you do, and avoid leaving them exposed to UV unnecessarily
How can I add even more comfort to my Vantage CT Seat?
If you’re looking for ways to further enhance the comfort of your Vantage CT seat we highly recommend looking into the Hobie Firm Kayak Kushions. Although these are not cheap, they are very good quality and we always get really good feedback on them. Its one of those products where you’ll be appreciating what it offers long after you’ve forgotten the price. They can be used to add padded comfort at the bottom or backrest (or both if you buy two). These work well on any Hobie kayak seat built from 2015 onwards (example image below demonstrates Kushions on a Pro Angler Vantage seat)

Will the new Vantage CT Seat fit into my old Hobie Kayak Hull?
We have received many questions from eager customers who want to know if they can fit the new CT Vantage Seat (introduced in 2015 models) into earlier model Hobie kayak hulls. We regret to inform you that no, this cannot be done, as the hull had to be remolded to suit. This is a shame (because we would have sold thousands of them if we could retro fit them). However due to design changes Hobie were required to make to the hull in order to fit the seat, so while unfortunate, this is but understandable given the design challenges of fitting a suspended seat into a kayak without compromising stability.
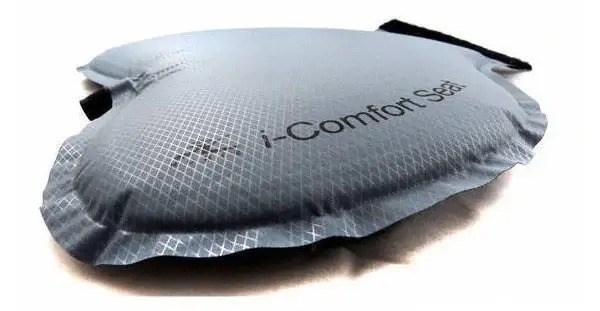
The only “off-the-shelf” option available to add extra comfort to early Hobie kayak seats is to replace the foam padded seat with a self inflating seat pad, otherwise known ad the Hobie kayak i-Comfort Seat Pad (example image below)


